Your Cart is Empty
Free U.S. Shipping on Orders Over $75

Do you remember seeing that kid at second base catching that line drive rocket - only to have the ball sail right on out of his glove to the outfield? Yeah, the kid's glove had a couple broken laces and he just let it go and they lost the game. In this article you will discover resources for fixing that old glove of yours.
Softball Gloves Don't Fix Themselves
Contrary to your thinking, things don't just work themselves out by themselves. Your job doesn't get done without you working at it. The grass ain't gonna mow itself. And your softball glove, or even more so, your kid's softball glove isn't gonna fix itself.
I know, it seems like such a small gap where the lace is busted. She hasn't complained about it. You see her struggling and missing some routine catches, but she must not be focused. Right?... Wrong. It's not your kid, it's her glove. She has a couple broken laces. They could have been retied or conditioned and now they have broken and the whole lace needs to be replaced. Don't worry, it's not that tough. You can do it in less than an hour. Really.
What Tools To Use
There are only a couple tools needed for a basic repair job. You will need a 6 inch lacing needle, scissors, and some needle nose pliars. Oh and some lace. Ok so that's four things.
How Much Lace?
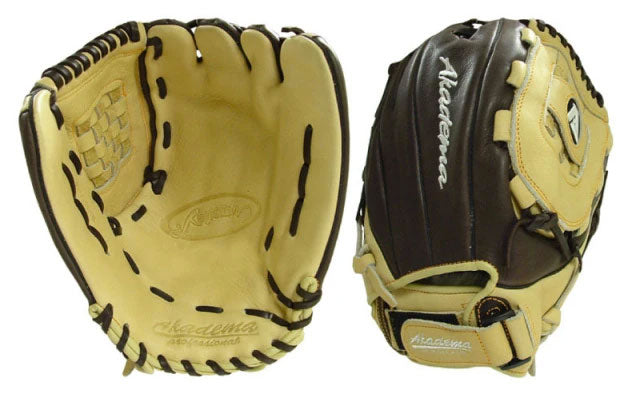
That's a fair question. To restring a fielders glove there are about five sections. You may only need to relace one or two.
1. Heel
2. Palm
3. Thumb
4. Web
5. Fingers and top of web
Some gloves have variations on this theme. Catchers and First base mitts are different. Each section generally uses a single piece of lace. You can get lace in 48 inch or 72 inch lengths. It's advisable to just do the 72 inch, usually about the same cost anyway. Better to have a little left over than not enough.
So, generally one 72 inch piece for the heel and palm. May get the thumb out of it too. Another 72 incher for the Web, and one more for the Fingers and top of web. Add another 72 incher just to be sure.
That's 4 pieces of 72 inch for a standard glove (12 - 13 inch).
Different Sizes of Lace
On many gloves, the Web and top of fingers will be 1/4 inch wide lace. The rest of the glove will use 3/16 inch wide lace. You can get by using all 3/16 inch lace and have no breaking problems. Many manufacturers do this.
You probably can't use all 1/4 inch lace if your glove was made with 3/16 inch lace. The reason is the holes are too small for 1/4 inch lace. It might rip the hole out or may just be too tight to get the lace through the hole. That is not something you want to discover after you are on the next to last hole that is double laced. So check your glove to see what size lace it came with.
Most catchers mitts use 1/4 inch lace throughout the whole mitt, so do most first base mitts. Check anyway, there are some that don't.
Running the Lace
Depending on which type needle you use. They come with the eye type but I recommend the screw in type. Either way, start by using the scissors and cutting an angle on one end of the new lace. Thread that into the needle. Make sure it is secure.
If you have some glove conditioner, rub a little on the new piece of lace. That makes it slicker and easier to run through the glove. Also, it's easier to do now than when it is in the glove.
Examine how the old lace runs in your glove. Find both ends so you know what to expect as you start. Untie one end and start pulling it out. Remove it through a couple holes, then thread your needle through those holes. Work all the way through following the route the old lace takes. If you only remove a few holes at a time, you will find it easier to trace your path.
Oh- depending on your taste, leave at least 4 inches on the tag end to tie the knot. You can leave more if you like extra long laces. I've seen some that are 6 inches long. Anyway, if you leave it too short, believe me it is a real pain to tie that knot. It takes a lot of cussing and pinched fingers. Or pulling the lace out and re-doing it all again.
Try to keep the laces untwisted. This can be difficult but take your time and try to keep the finished side of the lace out. So that it is showing. It just looks nicer that way. To do this you have to twist the lace a little as it goes inside the glove. Give it a try, you'll figure that out easy enough. It makes the lace lay better, knots tie easier and it just looks much better.

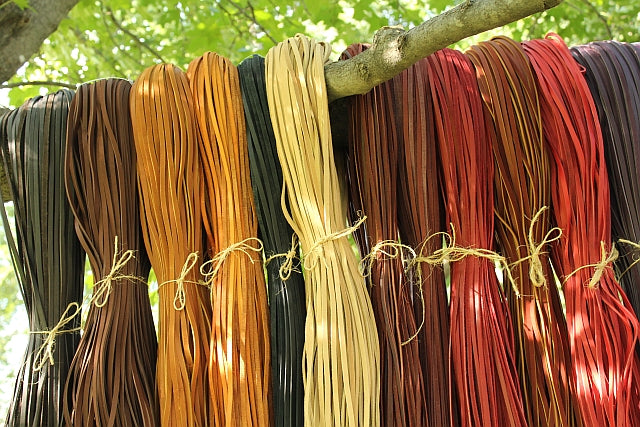
What Color and Where
There are a rainbow of colors available today. This allows you to take a stock glove and make it a truly custom glove by adding inexpensive colored rawhide lace. You can find the standard Tan, Black or Chocolate plus Red, Blue, Pink or Purple. Even different shades of Pink or Paisly Purple. So match your team colors by adding two or maybe three lace colors to your glove. Be unique, make different patterns. It is endless what kind of designs you can come up with. Be brave - restring your glove today.